Advertisement

Support
Configuring Microsoft Outlook 365 Email Client on Windows 10 for Philippines Online Service
Follow the Step-by-Step guide below to setup PhilOnline Email account.
Open Microsoft Office 365.
On Info select Add Account.
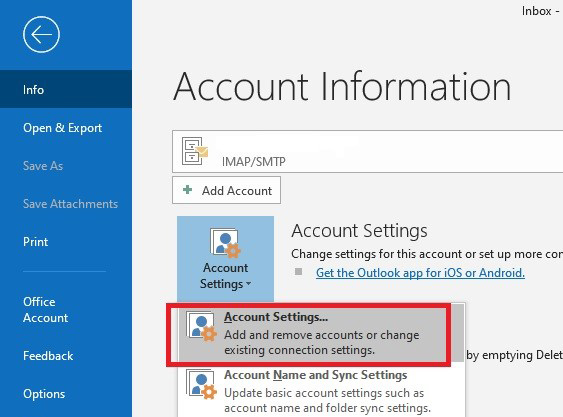
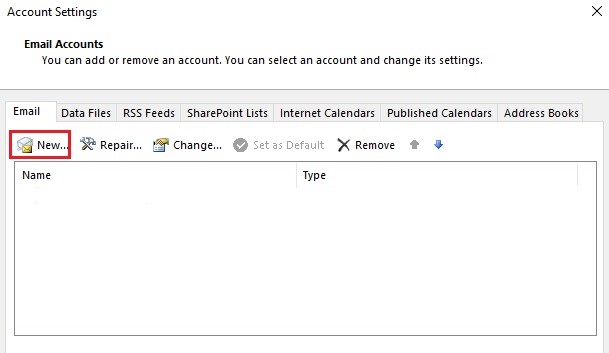
In the Account Settings window, select the E-Mail Tab and click New.
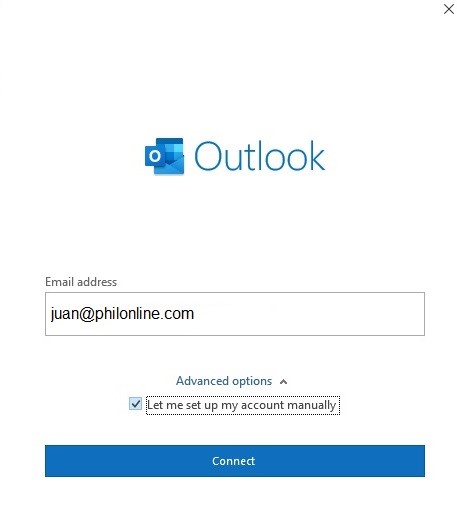
Enter your Philippines Online assigned email address (note this must include @philonline.com). Click Advance options and Check the "Let me setup my account manually" and then click Connect.
Enter your preferred Email Account Type on this screen:
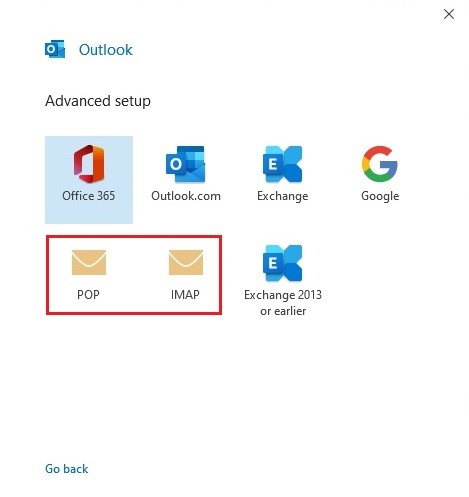
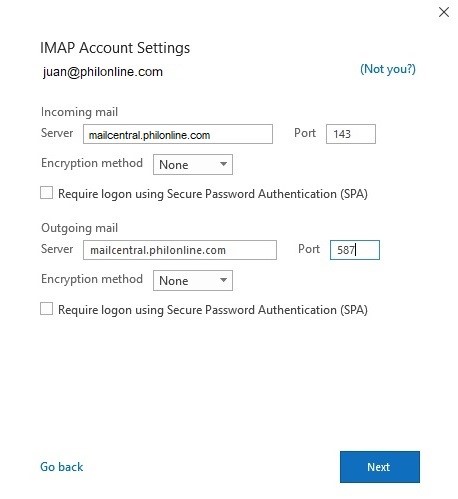
On this screen enter the following:
Account Type - if you wish to download your email to your PC or laptop without leaving a copy on the server, choose "POP". If not, you can choose "IMAP".
Email Address - you will have the option to change the default email address to your custom email address hosted with Philonline (e.g. juan@somedomain.com or an alias). If you do not have one then just type in the same email address as in Step 4.
User Name and Password - type in the username only (ie without the @philonline.com) and your mailbox password.
Incoming Server - enter "mailcentral.philonline.com" with port 110 (if using POP3) or 143 (if using IMAP). Please make sure that the "Use SSL to connect" is not selected/checked.
Outgoing Server - enter "mailcentral.philonline.com" with port 587. Please make sure that the "Use SSL to connect" is not selected/checked.
Once done, click Next button. If your username and password are correct then your email account setup should be finished and you will be able to send and retrieve emails from your Philippines Online mailbox.
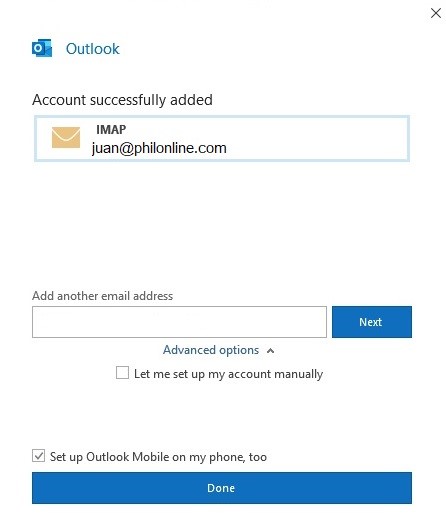
Note: If you are using IMAP, a new email account will appear on your Outlook accounts pane (on the left section of the application window). For POP, your emails will be incorporated in the "On My Computer" item in the account pane.